
Tag Archive: do it yourself
Its always disappointing when you buy something and it doesn’t work correctly…such it was with the 10 round magazine I bought for my Savage .17HMR. Originally it just came with one 5 round magazine, which is okay, but one is none so I had purchased a second 5 round magazine for it always. I was aware that they made 10 round magazines but truly saw no need to get one until after Sandyhook occurred and there was a lot of talk of limiting ‘high capacity’ magazines…so off I went to the local corner outdoors store and picked up a 10 round magazine…yeah, first off, I learned real fast that Savage makes a couple of different .17’s a Mach 2 and then the HMR…so wrong magazine. I finally found the correct one for my .17HMR on eBay, ordered it after going into sticker shock and never really have had a chance to use it until today (the rifle was sighted in using my 5 round magazines as I didn’t yet have the 10 round one). But today, I took my kids up to learn how to use the rifle and get some practice in myself and lo and behold…the 10 round magazine, manufactured by Savage went in HARD and getting it out…hahaha dynamite was being thought of but it finally came out with a lot of tugging and pulling. CRAP!!! Magazine NO GOOD…so off to the internet I go and what I found out was zilch regarding the way the magazine came and went into the rifle, I found a lot of information regarding .17HMR magazine not feeding correctly, but nothing about the magazine itself going in hard and not wanting to come out.
HMM…after watching people on YouTube ‘fix’ feeding issues (ding ding ding a light went off, I had one 5 round magazine that was hard to feed but did and I fixed that issue pronto) I got the bright idea that if you can fix the feeding issue then surely using similar techniques you can fix the magazine slide rails the same way…sanding!!! Taking a little off at time. Now everybody had a metal file or a sanding block or some sort of other ‘sanding tape’ to smooth out the burrs and sharp edges that caused feeding issues on the magazines but I have NONE of these and was impatient to make this work…surviving shtf mom light bulb time…emery board!!!
Yeah, that low tech thing that every woman used to have for her nails. Just a piece of cardboard with fine grit sandpaper on either side…ha! Got that…never really use them myself (fingers nails are not really conducive to gardening nor using a firearm) but I have them for a ‘trade/barter’ item along with some of the metal fingernail files and the boards used to shape fake nails too (these work wonders on split nails btw). So out came the good old emery board and remember the rule that less is more when working with a firearm (can’t replace what you take away but you can always take away more if need be) I went to work on the magazines.

First up, the 5 round magazine that fed hard…Super easy on the ‘lip’ of the magazine where it was sharp and rough (burrs) over which the bullet goes into the chamber…file going down one way only and then back and forth and within in minutes everything was smooth to the touch…blew out the dust and put 5 rounds in, kept the safety on and then cycled the 5 bullets through…PERFECT and SMOOTH for the first time!!
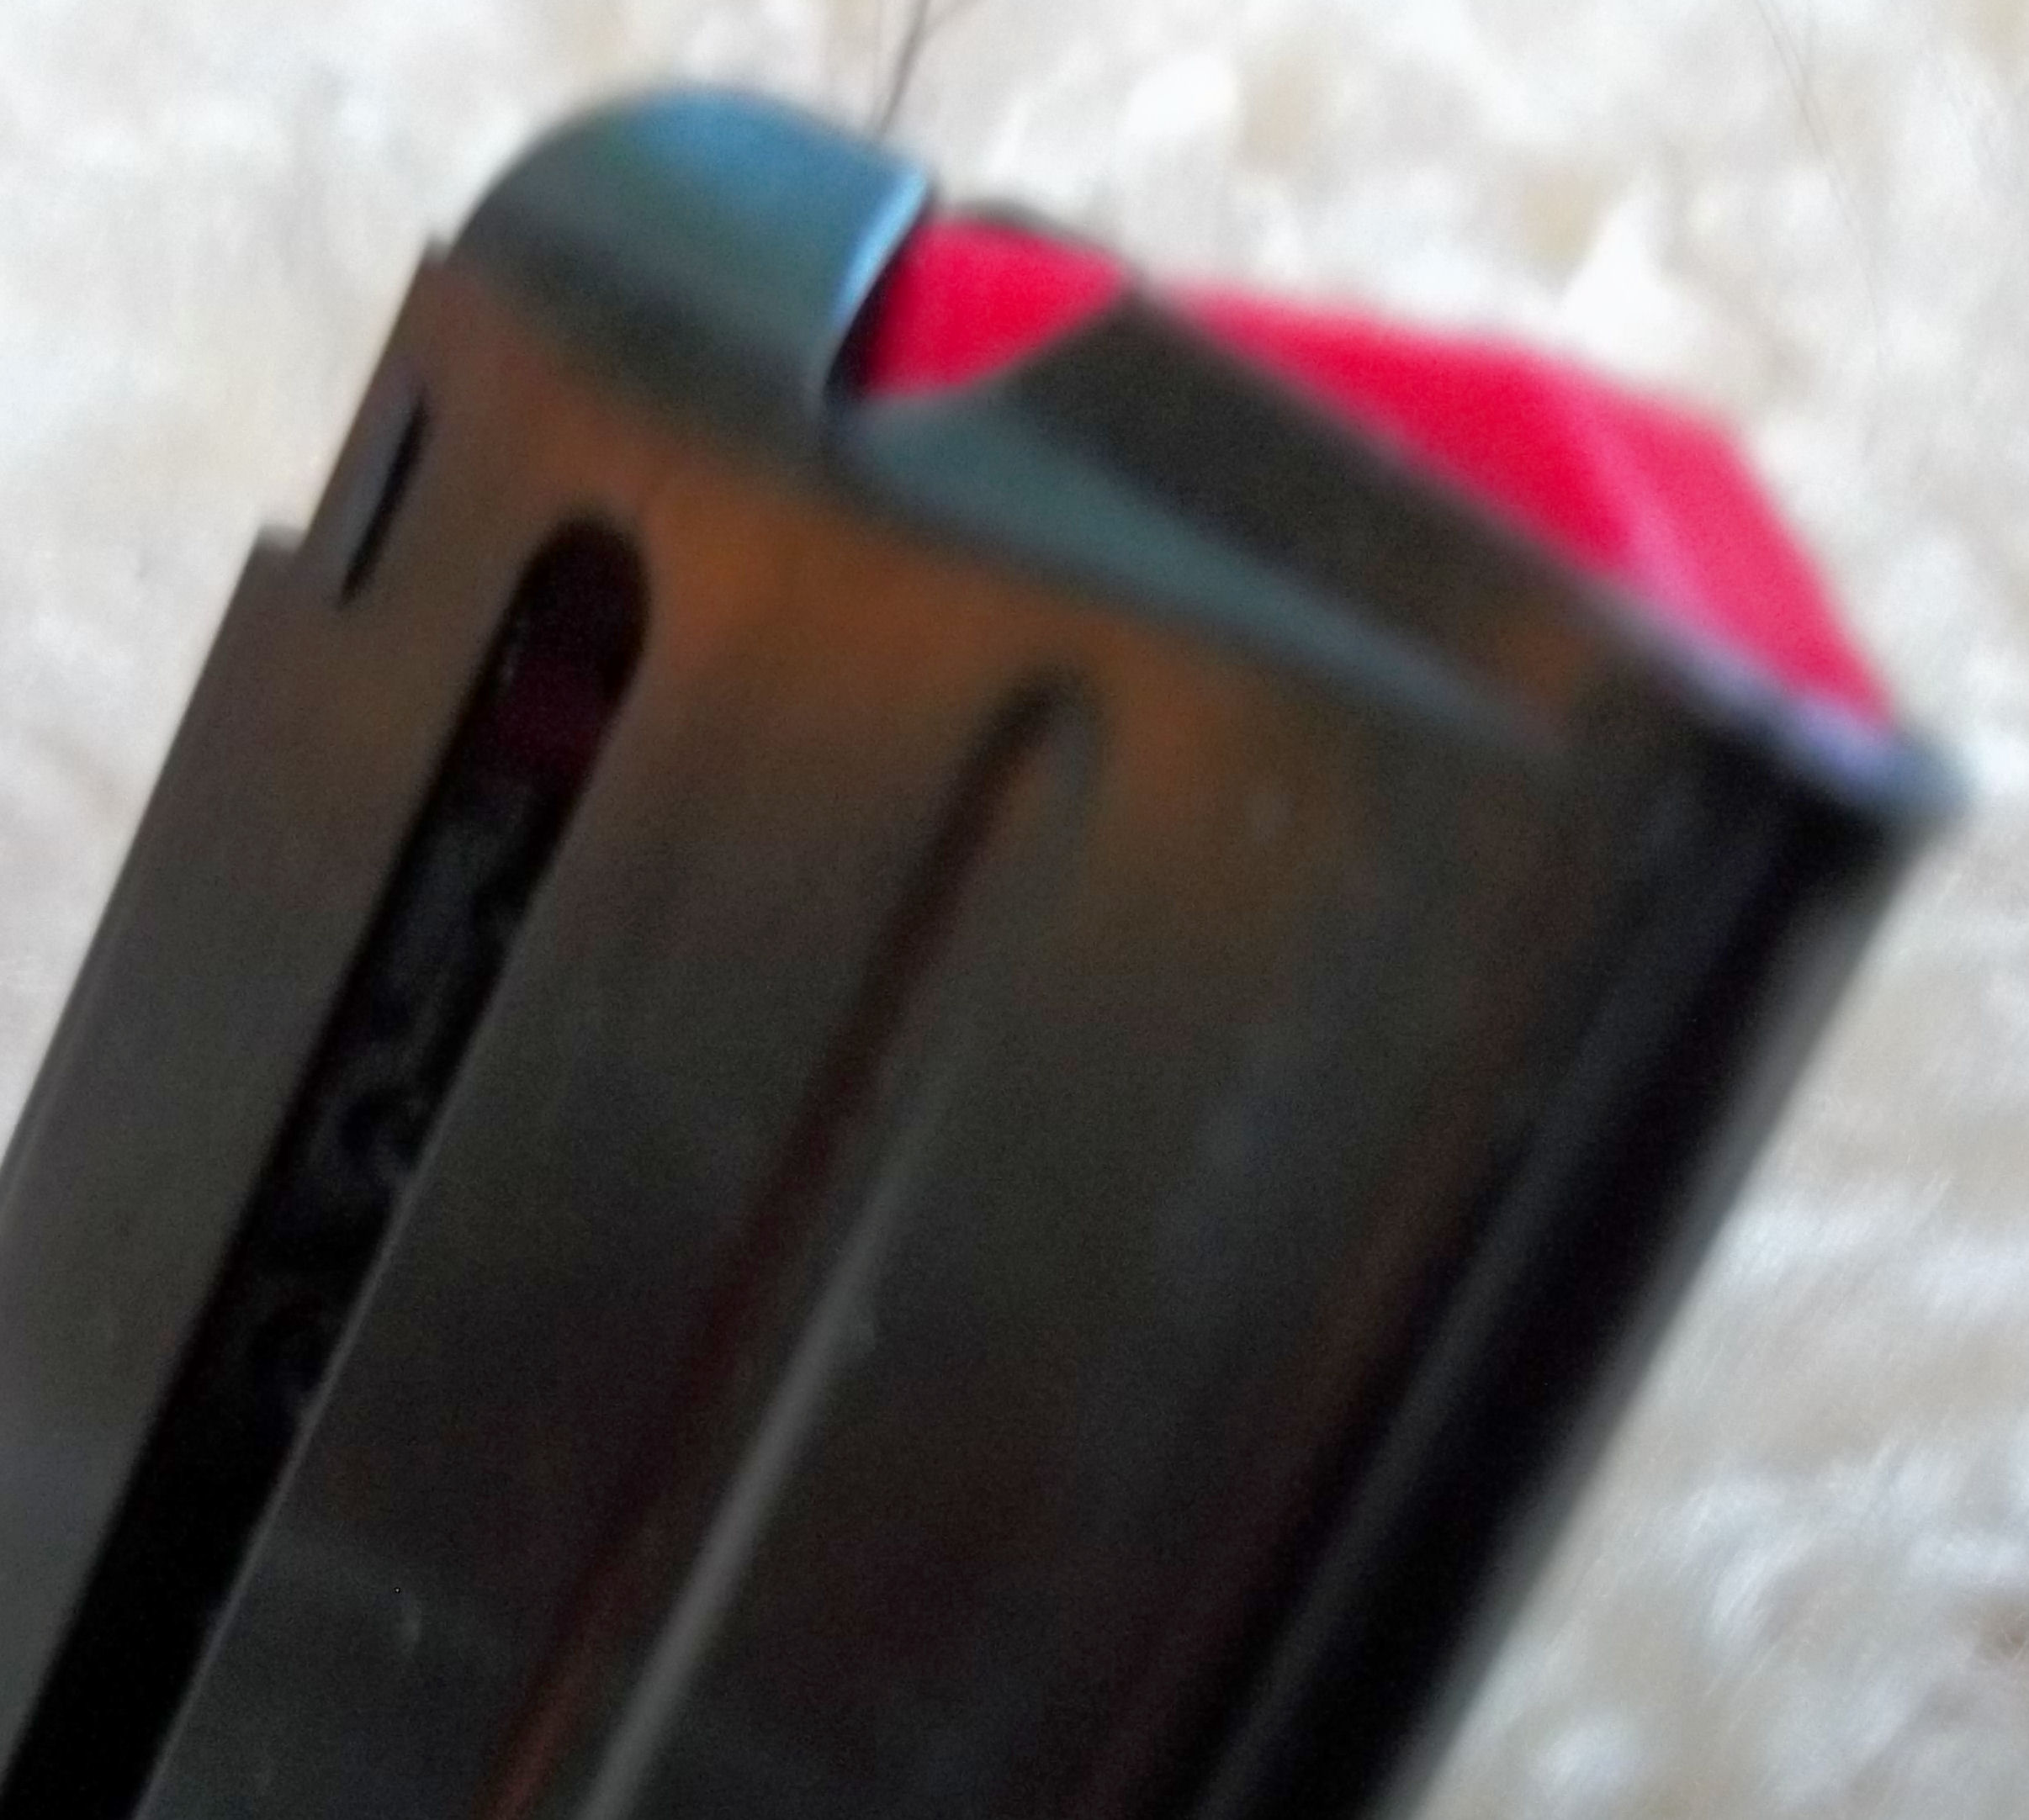
Having gained confidence with this success (remember, all I used was that low tech old fashion finger nail file) I went to work on the 10 round magazine, specifically the rails. Working slowly I did the inside edges on both rails, then went under the rails and finally sanded down the top of the rails. Tried it, still tight…back to more work…did this several times until it still went in a bit tight but came out more easily…still need to spend more time working on it but the magazine now ‘works’ correctly…still too tight for my taste, but at least it goes in smoothly now and comes out without much effort.
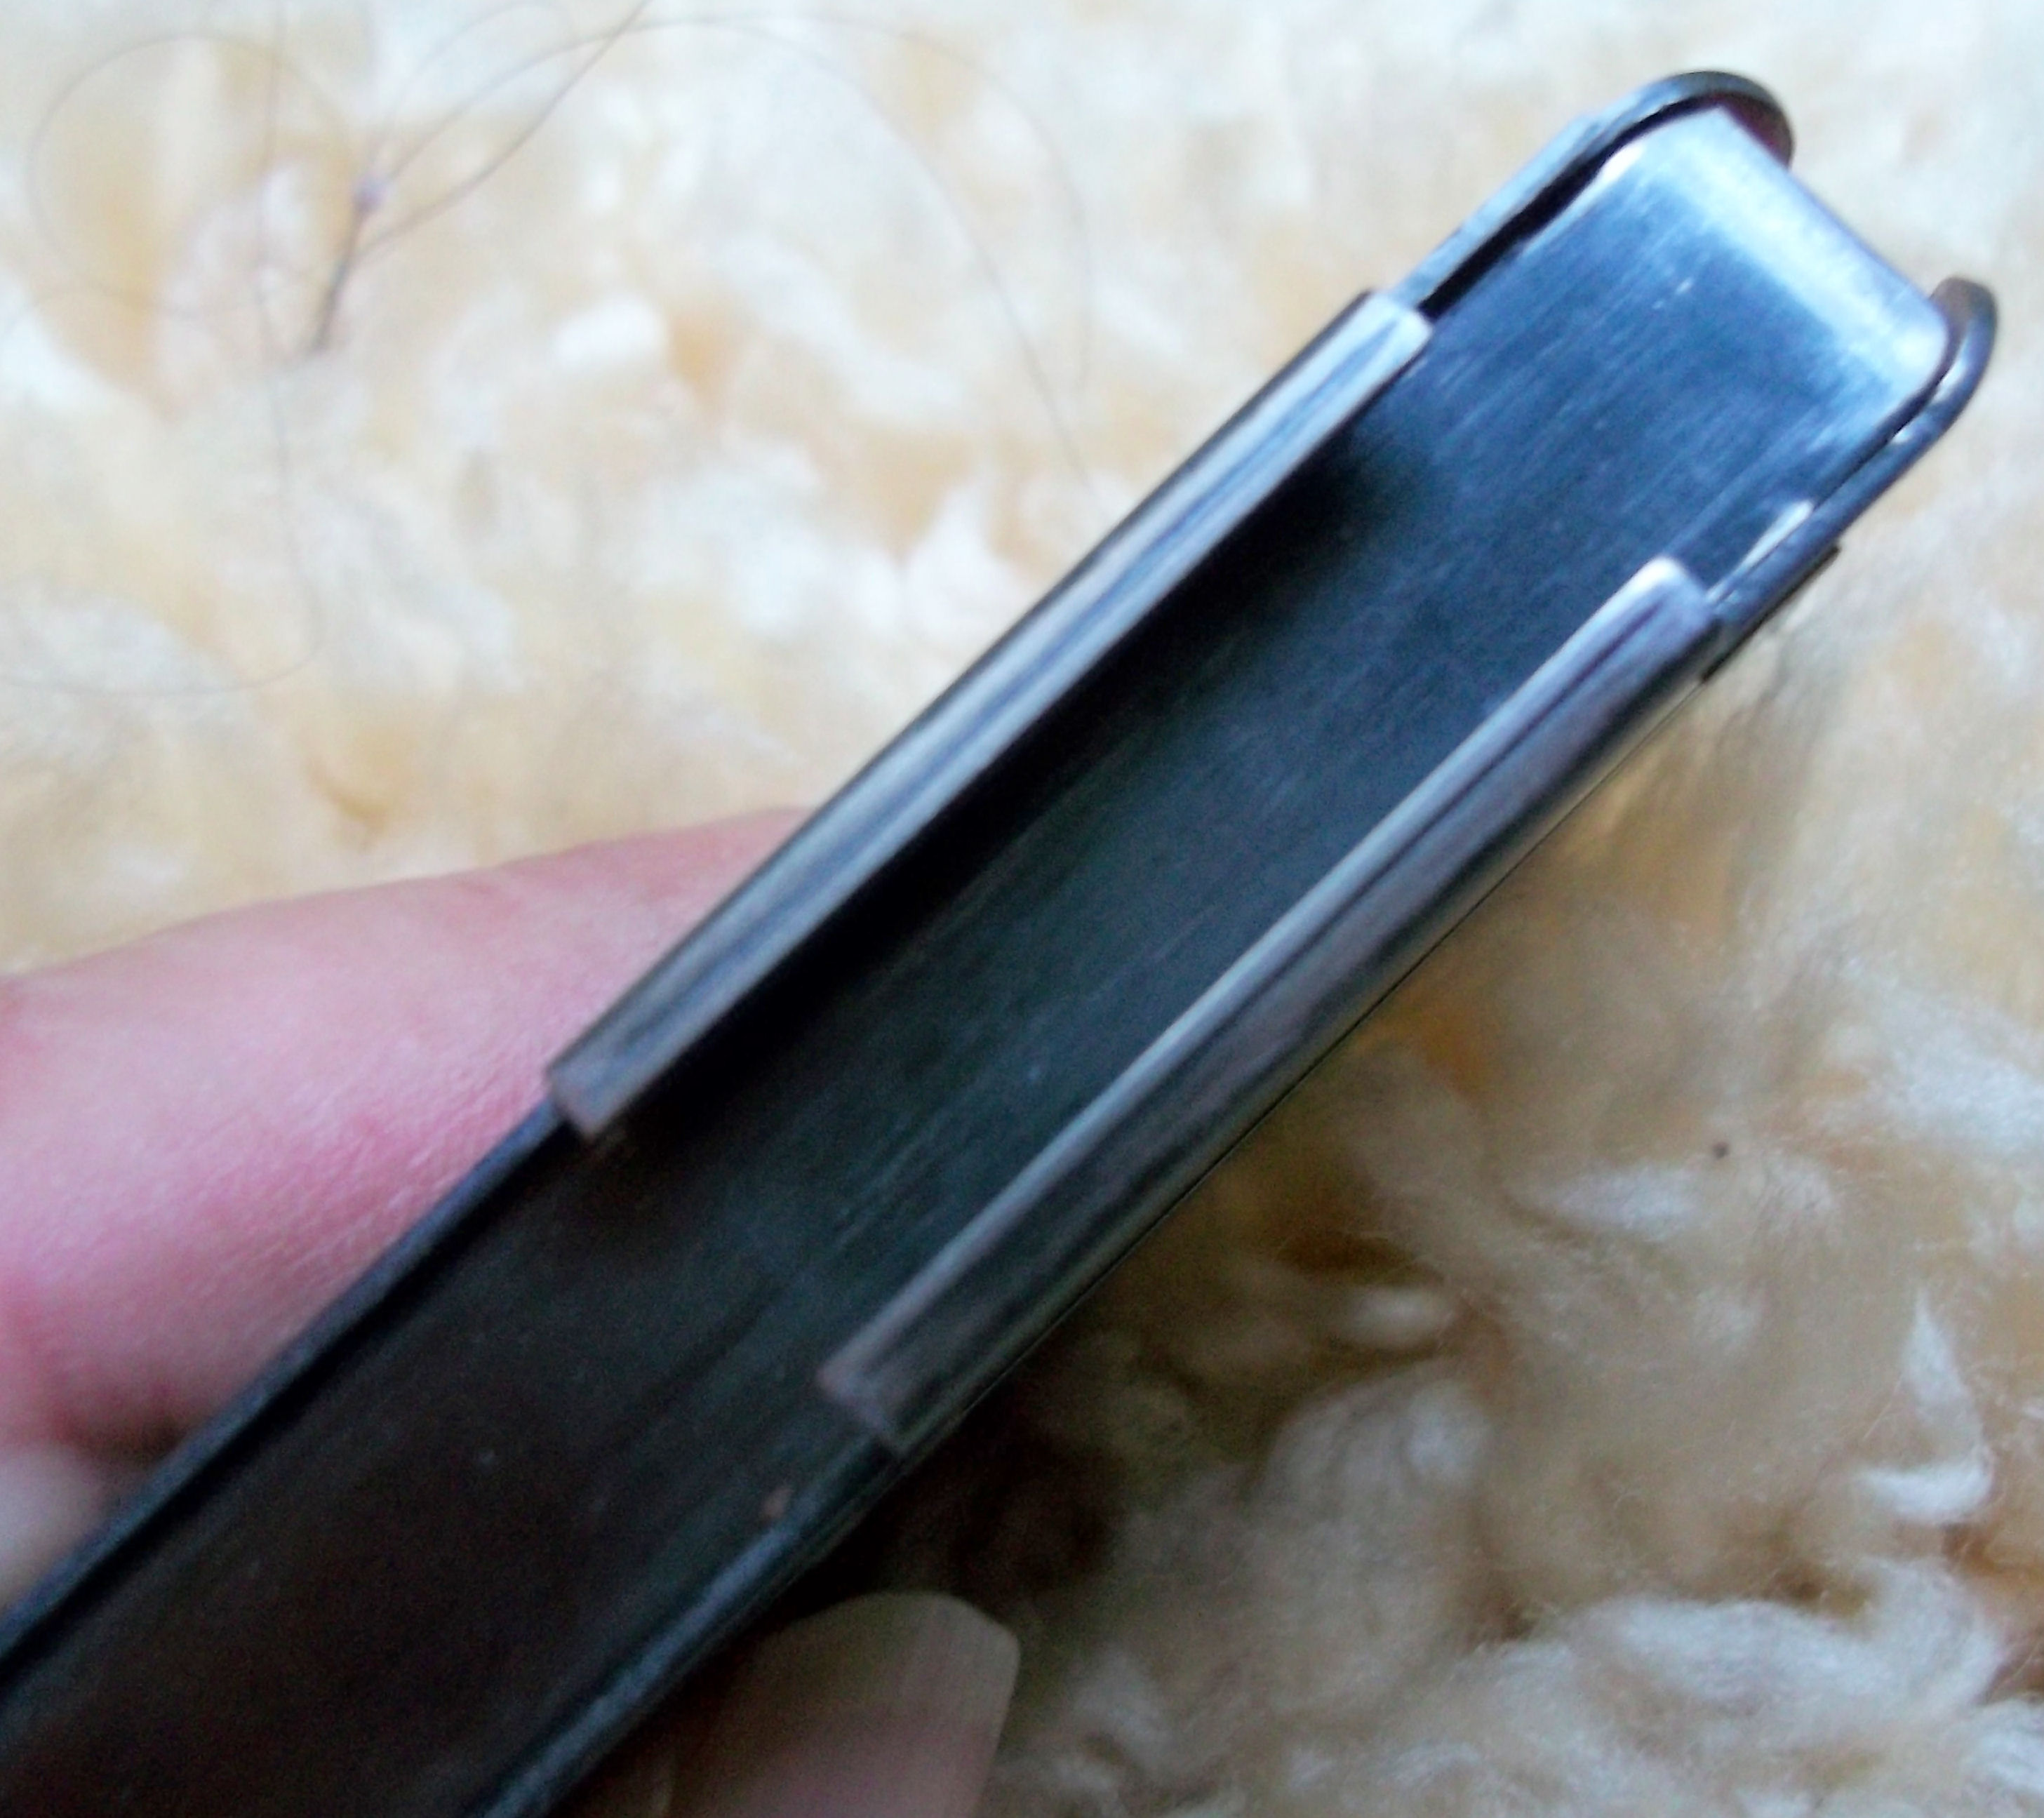
I just wanted to share my experience with you just in case you have personally run into these problems with the Savage .17HMR of the bullets not feeding correctly and/or the bolt working hard (look for the burrs and sharp edge where the bullet comes up, out and over into the chamber on the magazine) or having a hard time with getting the magazine in and out. This is an easy fix for these issues and costs next to nothing, dollar stores, drug stores, almost everywhere sells emery boards…typically $1 for twelve of them.
Just remember, easy does it, a little at a time and you can always take off more but can’t put it back…
ISD…okay…just what is that you ask? I is for improvised, S is Storage and D is for Device…Improvised Storage Device…yeah, okay, okay, I will admit that older son #2 came up with it and he is an admitted warfare nut and everything is put or translated into militaristic terms if you communicate with him. But hey, an ISD sounds lot better than ‘repurposed’ or ‘recycled’ doesn’t it?
So what is an ISD exactly…well, see the picture below for a few ideas…

Of course the wonderful, multi-purpose 2 liter soda bottle. I use these to store rice, flour type products, popcorn, salt, sugar and other liquids (not water though as they are too thin as I have found out for long term use/storage). Gatorade bottles are great too for storing rice, flour, liquids and BEANS very easily. (Anyone who has tried to get beans into a 2 liter soda bottle knows what a pain in the rear that is let alone get them OUT and I am not into self torture food storage). How about those lunch meat containers? Put them into the dishwasher and guess what? Instant free storage. Old salad dressing bottles are great for making your own salad dressings, storing ‘homemade’ liquid soap or, if you are like me and buy in bulk, putting that liquid into a manageable container. I save and reuse the spice bottles too, again, great for breaking down from bulk purchase to manageable and you can use them to make and store your own toilet/tub scrub. One gallon water jugs that have been used? Either refill them and put outside for use as grey water (flushing toilets, watering plants, etc.) or refill with some other liquid purpose (recently I made bug killer from concentrate and used a one gallon jug to store extra in). I saved the empty laundry detergent containers to refill and reuse with my own laundry detergent and make gallons of bug killer from concentrate. Cottage cheese containers, sour cream containers? Yeah, those things that we constantly throw away…perfect for storing non-food items in such as nails, screws, thread, crayons, you name it…if it fits, it stores. Big vinegar containers I reuse to make large amounts of cleaners using vinegar. And, I will admit to reusing those zip lock bags too, a simple scrub and air dry and you get more than one use out of them. I save and reuse anything that is a ‘container’. I have a couple of totes with clean empty containers in them ‘just in case’. You never know…Any one with more ideas? Please do share your reuse ideas for ISD’s…improvised storage devices.

Protein is an invaluable source of long term energy in a survival situation or in any situation in which we are called upon to exert more energy than usual (camping, running, etc.) and/or a time when you can’t really cook or want to keep it simple during and emergency…prepackaged dehydrated food is great if you can find it cheaply, but knowing how to properly dehydrate protein NOW, yourself, before something happens is something to learn how to do and after the initial expense of buying a good dehydrator you will wind up saving yourself tons of money, not mention YOU get to control what goes in your food.
Previously I had dehydrated chicken breasts using one of those smaller, cheaper food dehydrators and honestly, after rehydrating and trying to eat it on the go, I thought that perhaps there could be a better, more flavorful way of doing this.
I wound up buying last year an excellent Excalibur Food dehydrator at a good discount from ebay simply because I was becoming frustrated with the limited amount drying space I had with my old round one. It wasn’t very efficient at drying, the middle ring took forever to dry, with the bottom and top ones drying very quickly and uneven drying on all rings so I was constantly moving the food I was drying around and the large slots meant a lot of food fell through as it was drying…nope…I bit the bullet and bought a good, solid Excalibur and I highly recommend that if you are serious about drying foods for storage or use during camping that you get one…well worth the money!
So here we go again on how to dehydrate chicken, while the first article I wrote on dehydrating chicken is a great and simple start to doing so, I have tweaked my technique and have learned a few tips to add to dehydrating your chicken to make your chicken turn out so much more better.
What you will need:
Dehydrator
Chicken (whatever you can lay your hands on cheaply)
Large pot for boiling your chicken
Powdered Seasonings for infusing flavor into the chicken
One thing I have learned since last writing about dehydrating chicken is that DARK MEAT is the best when dehydrating chicken. When you go to rehydrate or eat it like jerky, it rehydrates much more readily which can be important if you are carrying it with you to eat on the run.
I also like to use thigh or leg meat verses the breast…again, just easier to rehydrate. But use what you have, white meat, thigh, breast, leg, whatever, the process drying is the same. My only note on chicken breast is that it rehydrates more slowly and is tougher after rehydrating (not to mention it COSTS more money unless you can get a real deal on it). And don’t forget you can use bone in or bone out.
So, I found on clearance boneless chicken thighs (mostly dark meat) at the local market…spent maybe $2 for the package. If you are using chicken with bones in it, you will just need to spend the time taking the meat off the bone before putting in the dehydrator.

In one large pot I put 12 cups of water, seasonings to taste (I like to use garlic and onion powder with a touch of salt) and put about 1/3 of cup of each into the water. Then in goes the chicken.
At this point I bring the water, seasonings and chicken to a roiling boil and allow it boil itself until done. You will have to gauge for yourself when it is done cooking as boiling/cooking time will depend upon what you are using. To speed up the process of cooking and if you are using chicken breasts, I have found that by cutting up the breast into chunks FIRST (raw) and then cooking saves time and you don’t over cook the thinner chicken.

When the chicken is done cooking you will then need to do one of two things at this point…if you are using chicken that has a bone in it, you will need to get the meat of the bone place the meat on a plate covered with a couple layers of towels.
If you are using boneless meat you may just place the meat on a plate covered with a couple layers of towels.

FYI: That water you just added spices to and boiled your chicken in? Excellent stock/soup base…don’t throw it away! Extend your money! Can it, freeze it, etc. IF you find yourself without power you have ‘instant’ soup base to rehydrate your chicken in!
Next, you will want to take two more towels, lay them over your meat and press the ‘juice’ out of the meat…this helps to speed up the drying time and keeps the meat from becoming too tough from ‘over dehydrating’ which can easily be done since everything you dehydrate is from the outside in and meat likes to retain its moisture! It wouldn’t to ‘burn’ (over cook so to speak) your meat!
Then allow to cool to room temperature, to speed this up you may place in the refrigerator. I am not sure WHY this helps, but by accident and then by design I have found that this really helps with retaining texture, taste and helps prevent the meat from being tough after rehydration (even with chicken breasts).
After your chicken meat cools off you will need to pull or cut into bite size pieces or whatever size you want. I just like bite size because its faster to dry and easier to rehydrate in your mouth if you want to eat it like that and if using in soups or casseroles you require less water/time to rehydrate (which is important especially if using with noodles or dehydrated veggies which rehydrate faster).
Very lightly spray your trays with an oil (not a lot, just a very, very light coat). This will prevent sticking which is very important if you are using one of the dehydrators that cheaper ones with the big slots. Not so important with an Excalibur as the screen is flexible, but I still spray, makes clean up easier!
Now you are ready to put your chicken pieces on the drying racks…

At this point, close up your dehydrator…if you have one that allows you to set a temperature on it, you will use 155 degrees temperature setting, if not, just turn it on.
Leave the dehydrator be for at least 3 hours before opening and checking on the chicken. After 3 hours I found mine almost done. You may or may not have the same experience. But if not almost done at this point (and there are many factors that control this) close back up and check again in a couple of hours.
For those with the smaller, cheap dehydrators you may find yourself having to move trays and chicken around to get more even drying. If I am dehydrating A LOT of meat in my Excalibur I wind up moving the racks around once, the top one and bottom one go into the middle and the middle racks go on the top/bottom. But with only 2 racks in I did not have to do this.
IF almost done, shut it down and allow to cool again. I left mine overnight.
The point being is that you will want to shut the dehydrator off when the meat is almost completely dry and allow to cool off.
After cooling off, restart your dehydrator to finish dehydrating. Be careful at this point to check about every half hour so you do not over dehydrate and potentially burn your chicken.
You will know its completely dehydrated when it is no ‘spongy’. I like to ‘sample’ a piece. It will be ‘dry’ and crunchy but easy to chew. Don’t worry if it’s ‘hard’ that happens, but the more you dehydrate meat the better you will get at gauging when its ‘perfect’.

Allow to cool again before packaging by the method you want to do so. If you will be using within the week, ziplock baggies are great…anything longer than a week and you will want to vacuum seal the chicken some how, in a jar or a food saver, though the old timers never did this! For long term storage you will want to remove all the oxygen for best results and longest shelf life. Will store this way for AT LEAST a year, depending upon storage conditions.
Dehydrated properly, chicken (or any meat) is a great way to save money on food storage, make ‘fast food’ meals with little to no mess (one pot! Ever tried cooking after a hurricane? The less ‘pots’ the better!) or it’s a cheap way to make your own camping/bug out food.
My end result:
About 4 cups of protein and weighs in at just over 2 ounces.

To use:
Pretty simple, you can either just munch on it using your own spit to rehydrate it or you can add to water, soups, and so much more! Put together with veggies and noodles in water for a fast meal. Takes about 15 minutes in boiling water to completely rehydrate and heat depending upon the size you make the ‘bites’.

Softwater Homemade Liquid Laundry Detergent
3 ingredients!!
Ever wonder about all those homemade laundry detergent soap recipes that you see around? Many of them are made for places with ‘hard’ water, but lucky me! I have soft well water and have come up with this particular recipe that can be made for pennies per load that works well for those with soft water. If you have softwater you do not need all that soap to get things clean. And if you use too much soap in the laundry and you have softwater you can wind up with dingy looking clothing that actually HOLDS THE DIRT since normal rinse cycles are not enough to get the soap out.
I like to pre-make a lot of the soap ‘ingredients’ at one time so I have plastic containers that I keep them in ready at hand whenever I need to make laundry detergent or whatever out of the ingredients.
I prefer to make the liquid over using the powdered version since soap doesn’t easily ‘melt’ in cold water.
Note: the harder your water (and if you are on city water you have very hard water) the more ‘soap’ you need in the ‘soap’ and I will list an alternative reciepe to compensate for this.
What you will need:
Fels Napa or some other soap such as castile or even homemade soap
Borax
Washing Soda (not BAKING SODA)
5 Gallon Bucket with lid
Long Wooden Spoon
Metal Pan
Containers for finished soap- gallon milk jugs, old laundry detergent jugs, etc.
Grater
Funnel
Measuring Cup
Plastic Containers (if you want to make up more than one 5 gallon batch to set aside for future use, recommend!)
Gather the required items, the soap, borax and washing soda can typically be found in almost any grocery store or big box store, but you may have to check around for the washing soda.
Using a grater (I have a big dedicated ‘soap grater’ that I picked up on ebay for next to nothing which is actually an old cheese grater) grind up the Fels Napa Soap Bar or whatever soap bar you choose to use (just avoid ‘commercial’ bath soap…will NOT WORK). You will wind up with quite a bit from one bar…set aside.

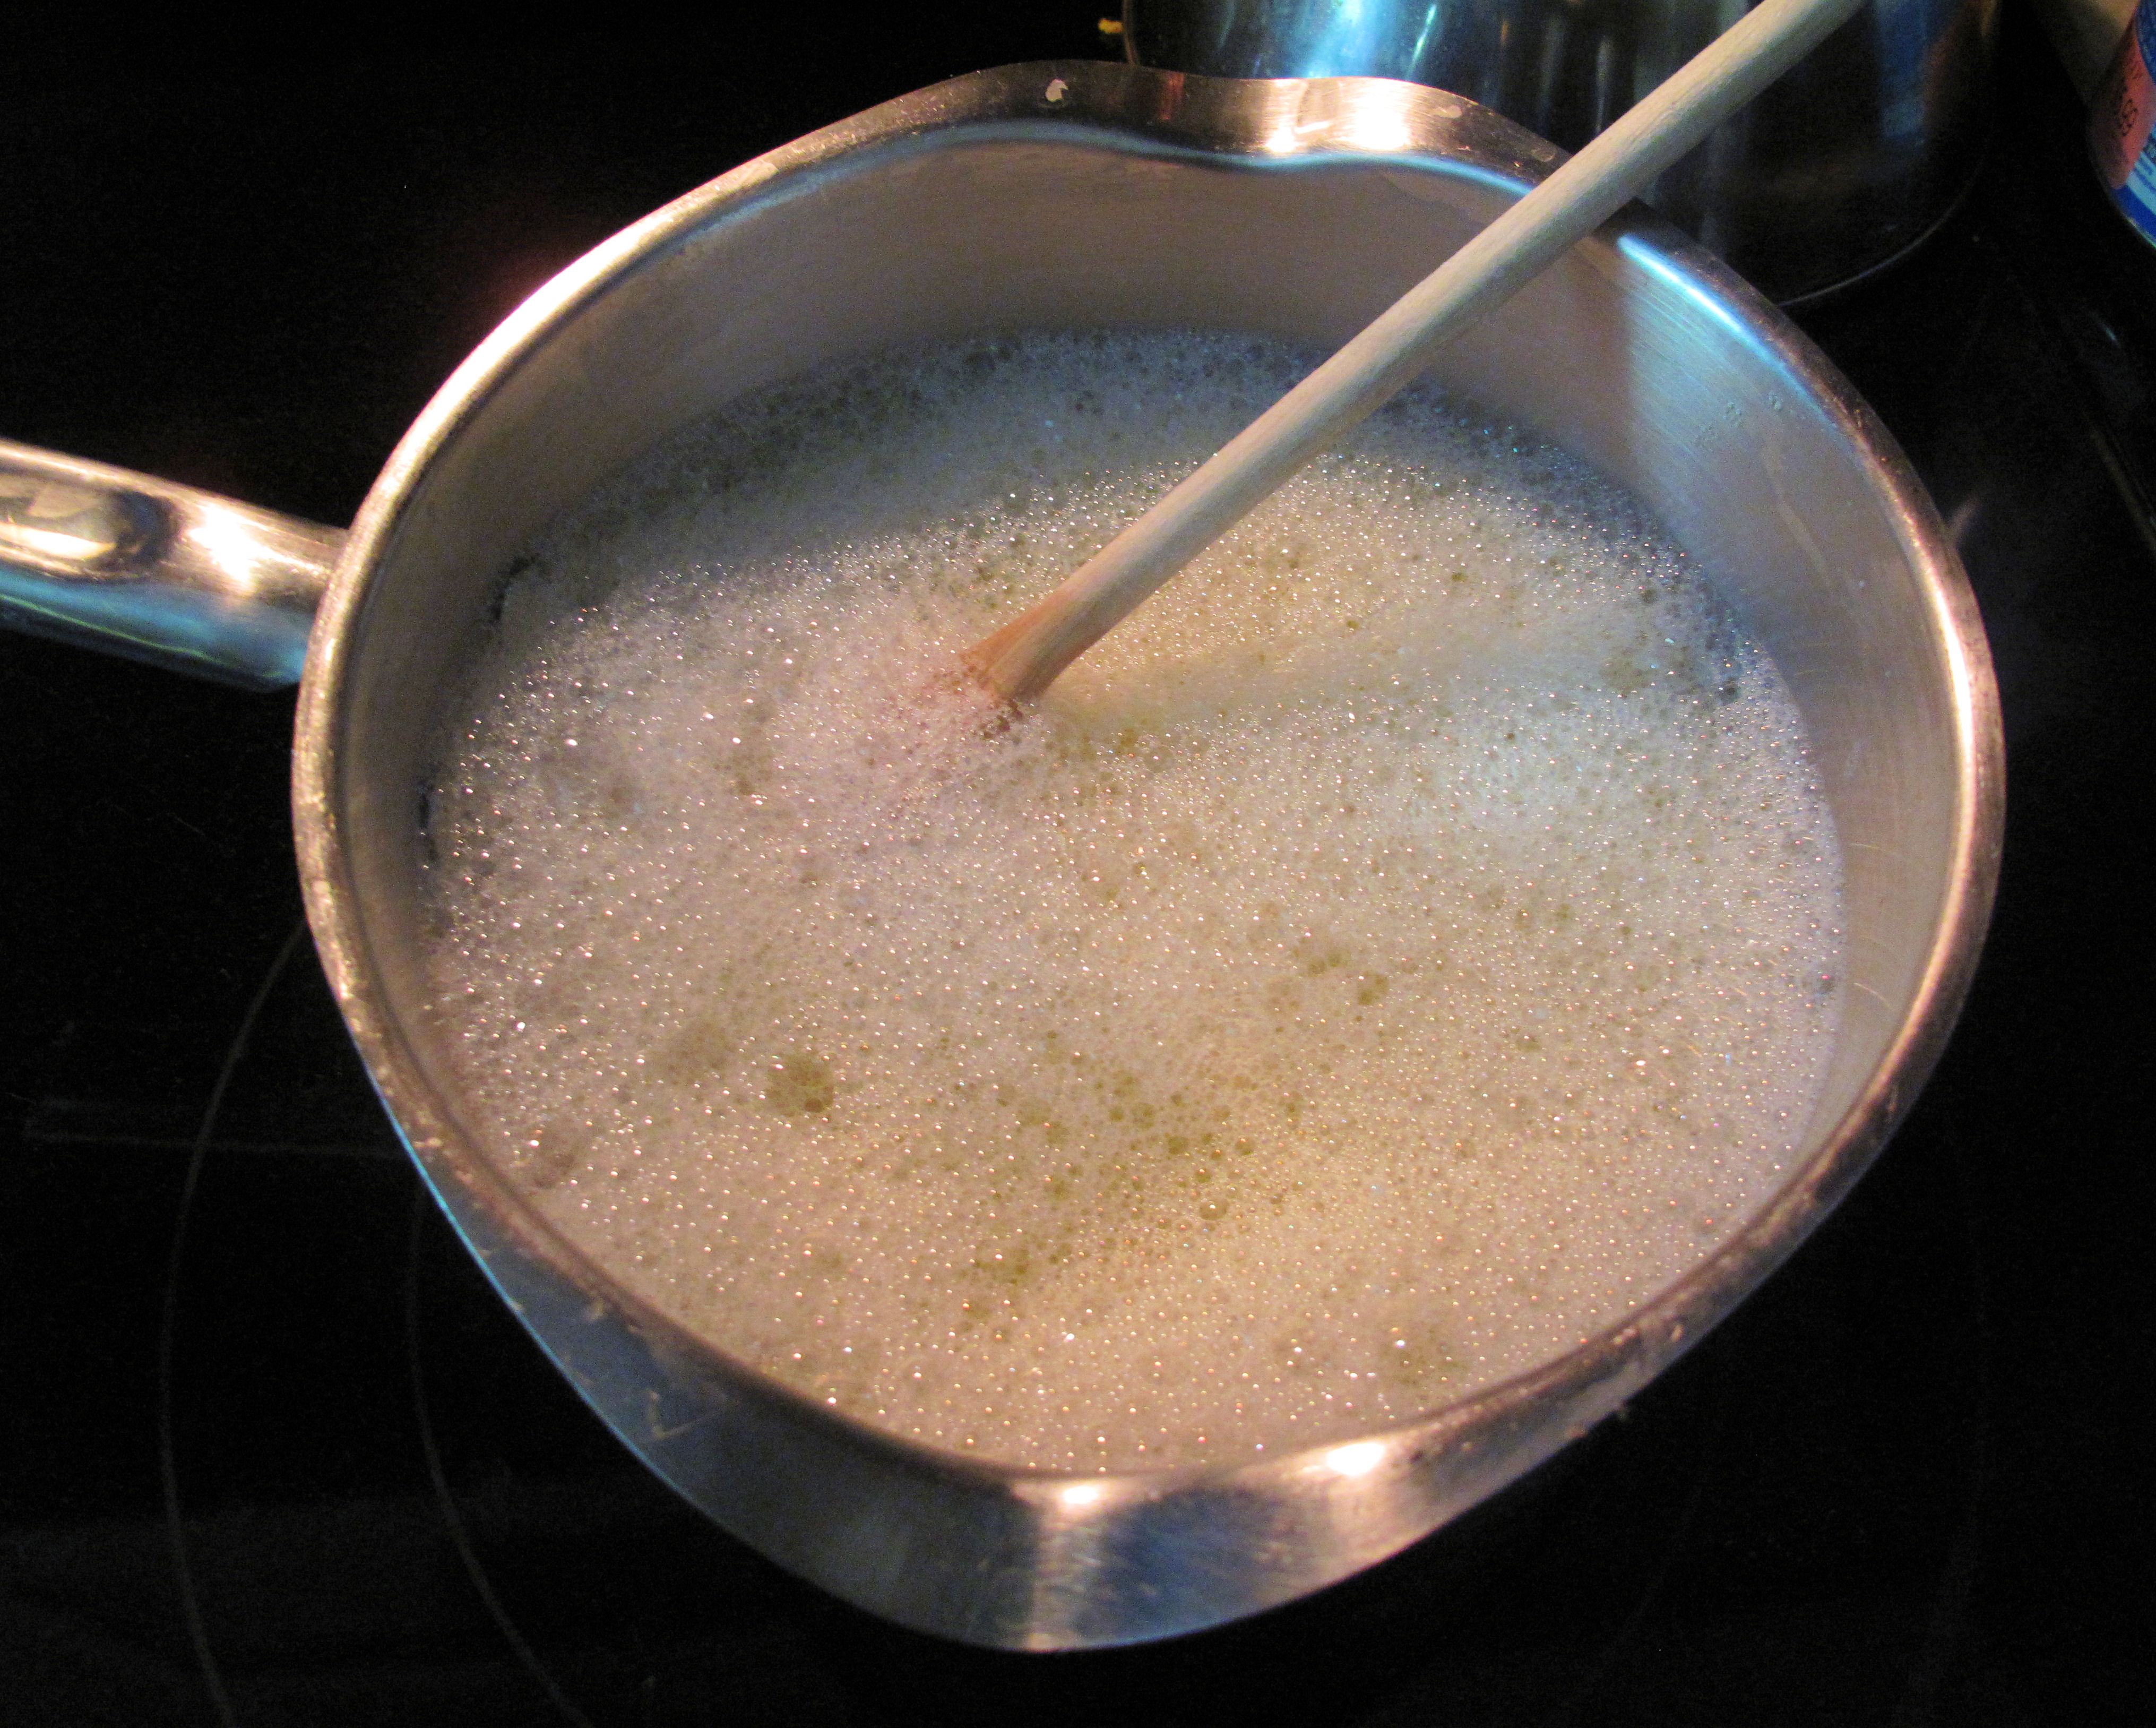
In a metal pot, put 4 cups of hot water (from the tap is fine) and place ½ cup of grated soap (do not pack it) into the water. Put pot on stove and set your settings to medium-low…Stir this continually with wooden spoon until soap is dissolved/melted.

DO NOT LET IT BOIL
It will be slightly foamy. You are not done melting the soap until you have no chunks or flakes left.
Get your 5 gallon bucket with the lid.
Fill the bucket half full with hot water (the hottest water you can get from the tap will work just fine!) and put on the floor.
Take your melted soap water and add to the bucket
Next add ½ cup borax and ½ cup of washing soda to the bucket
The measuring cup shows 1 cup of the washing soda/borax mixture (1/2 cup plus 1/2 cup is 1 cup)


Stir WELL until all powder is dissolved.
At this point, finish filling your bucket with more hot water to about 1 inch from the top.
Stir WELL again…be sure to get down to the bottom of the bucket while stirring…this soap mixture will NOT hurt your skin at all and easily rinses off.

Cover and let sit for 24 hrs.

After this cooling off and waiting time take the lid off, you will find that it has thickened on the top and bottom into a ‘gel’ like substance….it may look runny or separated…or with chunks of goo through out the bucket…this is OKAY and NORMAL….STIR AGAIN WELL!


Get your containers and funnel and measuring cup now. I recommend putting down towels on the floor just in case of an opps so you don’t spend a lot of time cleaning the floor (trust me on this!)
Fill your containers now…I like to use the measuring cup to scoop out the liquid detergent from the bucket and then pour through the funnel into the containers…at this point if you would like to add essential oils then add 5mls per gallon and shake well…All done…no fabric softener needed.

OF NOTE: Shake well in the smaller containers before use each time, it will separate again.
Since I use laundry detergent containers I just use the same amount that I would as if it was store bought. So use the ‘normal’ amount that you would use of liquid laundry detergent. This is for softwater ONLY.
HARDWATER
If you have hardwater/city water you will need to INCREASE the amount of soap, borax and washing soda, but the directions on how to make are the same.
If you are making up a lot of soap at one time for future ‘making’ just be sure to grate one bar at a time and place what you get from ONE BAR into a baggie. Alternatively you may weigh out 4.5 ounces of grated soap bar.
Hardwater Recipe:
1 Full Bar of Fels Napa (or other soap) Grated or 4.5 ounces
1 cup Borax
1 cup Washing
Follow the same directions for making softwater liquid laundry detergent.
When you are using this homemade liquid laundry detergent you will want to use ½ cup per load (about 160 loads or so) and slightly more for heavily soiled clothing.
Enjoy!
UPDATE 8/23/2013
I have been using this batch of homemade soap for softwater for the past 2 weeks…EXCELLENT!!! no pre treating of light stains, clothes are brighter, softer and best of all, they smell CLEAN and not soapy!
If you try this, let me know how it turns out for you!

No Brown Recluse No Fiddlebacks In Virginia? I Beg to Differ
Soo…there ain’t Brown Recluse Spider in Virginia eh??? Or so ‘they’ say according to ‘their’ maps. I personally know better from about 20 years ago when I was bit one time on the shoulder doing new construction work and then about 6 years ago when I was bit not once, not twice but THREE times on my calf.

Never saw one though up front and personal until yesterday afternoon…looky what I saw on my ‘screen’ to my workshop only 3 foot away from me:
Yep, that’s a Brown Recluse spider, born, breed and hiding out waiting for me to walk through the ‘screen’ (which is actually a sheer curtain I hang up at the shed door).
Here is ‘map’ where they are most commonly found:

The below information is taken directly from an OSHA Fact Sheet (link at end)
The brown recluse belongs to a group of spiders commonly known as violin spiders or fiddlebacks. The characteristic fiddle-shaped pattern is located on the top of the leg attachment region (cephalothorax). Because they are secluded and withdrawn, as their name implies, the brown recluse avoids open spaces. Brown recluse spiders are dangerous and they can bite and inject toxic venom.
Identification
• Body size: 1/4 to 3/4 inch
(6.4-19.1mm)
• Color: Golden brown
• A dark violin/fiddle shape
(see top photo) is located on
the top of the leg attachment
region (cephalothorax) with
the neck of the violin/fiddle
pointing backward toward
the abdomen.
• Unlike most spiders that
have 8 eyes, the brown
recluse has 6 eyes. The eyes,
arranged in pairs – one pair
in front and a pair on either
side – can be readily seen
under low magnification.
Habitat
The Brown Recluse Spider
builds small retreat webs
behind objects of any type.
Symptoms
• The severity of the bite may
vary. Symptoms may vary
from none to very severe.
• The bite generally becomes
reddened within several hours.
• There is often a systemic reaction
within 24-36 hours characterized
by restlessness,fever,
chills, nausea, weakness
and joint pain.
• Tissue at the site of the bite
and the surrounding area dies
and eventually sheds.
Protection
• Wear a long-sleeved shirt, hat,
gloves, and boots when handling
stored boxes, firewood,
lumber and rocks, etc.
• Inspect and shake out clothing
and shoes before getting
dressed.
• Use insect repellants, such as
DEET or Picaridin, on clothing
and footwear.
Treatment
• Clean the bite area with soap
and water.
• Apply ice to the bite area to
slow absorption of the venom.
• Elevate and immobilize the
bitten extremity.
• Capture the spider, if at all possible,
for identification purposes.
• Seek medical attention.
https://www.osha.gov/OshDoc/data…Facts/brown_recluse_spider.pdf
Here is something that they don’t tell you: most of the time you won’t even KNOW you have been bitten, let alone actually SEE the sucker that bit you. I know the times I have been bitten I didn’t even think about a brown recluse bite until after the tissue in the area started necrotizing and the fist time it got so big (the necrotized area) that it was the size of half dollar and I wound up at the ER for something else and the nurse saw it (the wound) and freaked. The next time I was bit I thought they were bug bites until they began ‘pitting’ (necrotizing) and I immediately remember the first time I was bit by a recluse.
And medical attention? They give you Keflex and send you home and tell you ride out the WEEKS that it will take your body to fight the venom and heal…yeah, no joke…nothing to do except prevent and ‘infection’ and keep the wound clean…seriously..
And in a shtf situation or you can’t afford to go to the doctor just to be patted on the head and handed an antibiotic for hundreds of dollars, what are you going to do?
The ‘treatment’ advice above is great general ‘bite’ advice…but personally here is how I have always taken care of brown recluse bites (for some reason I am a recluse magnet) with EXCELLENT results:
BERGAMOT ESSENTIAL OIL DROPS STRAIGHT ON THE BITE
4-6 times a day
Seriously, that it…the first bite since it was so large I used hydrogen peroxide to clean out the dead tissue…let it dry out and then applied the bergamot essential oil, but the wound healed within 10 days and I used no antibiotics…minimal scaring too.
The next I was bitten I immediately applied the bergamot essential oil straight on the bites and while the skin discolored the necrotization only got to be about the size of eraser head and then healed within 4 days…
And that is all I DID…and now, living out the woods almost any bite that I know for sure isn’t a tick bite or mosquito or fly bite (ugh, May Flies and these little orange flying things around here), out comes the bergamot and I forget about it…no issues…
One strong word of caution: this is just what I do and I am not advocating that YOU do this…use your head and if you can see your doctor, especially if you become very sick…just use your head please… I believe that prevention is key in avoiding the doctor and what I have written is what works for ME. You may want to try it yourself or keep a bottle of the bergamot essential oil in your bug out bag or if you go camping just to ‘prevent’ infection, etc. especially if you are not sure of what bit you (since normally you won’t feel the bite from this spider). Everyone will react different and I am writing about what works for me and hopefully you will never need this ‘emergency’ advice from one prepper to another. But it might be worth the small investment of a few dollars just in case…save the antibiotics for something really bad!
Other notes: when self treating when professional medical help is not immediately available I like to use the rule of thumb…treat aggressively and often and don’t IGNORE anything. Don’t down play something new or unusual…
And one last thing: All citrus essential oils are oils that make the skin photosensitive…meaning, if you use the oil on your skin and go into the sun with that area where the essential oil was used…it can cause a bad BURN. So keep it covered….
One more thing to go into the woods with!
You may find more information on this subject at:
Survivalmedicineblog.com